Showing posts with label Heat embossing. Show all posts

Sunday, March 6, 2016

Papertrey Ink - MIM Ombre Stenciled Backgrounds

Hi all!!

I've been away for a month and a half, but for good reason. I've had a bunch of work stuff that I've had to do and I started taking a grad class in order to renew my teaching certificate that is taking up a lot of my time! Ugh!

Anyway, I have been crafting! I've been crafting like crazy actually, I just haven't had time to film much of anything or post anything. I have filmed 2 videos, one that I've already posted but haven't had time to blog about, and another one that I haven't posted yet, but will be posting this week!

The reason I'm writing this post is because I wanted to enter the Papertrey Ink Make It Monday challenge this week. I've watched almost all the MIM videos since I started shopping with them in 2013, but this is the first challenge I've actually participated in. I usually don't have time/inspiration throughout the week to actually do the challenges, but this one really spoke to me! I am absolutely in love with the new Papertrey Ink stencils and I can't wait to see what new ones they come out with the in coming months!

So anyway, this month's challenge was Ombre Stenciled Backgrounds - adding dimension to sponged backgrounds.

I had already been using my stencils to make 2 different cards, so I decided to use the 3rd stencil in the pack, the one with the little stripes.

I used a tutorial by Dawn Griffith here to make a sliding card. So here my take on this week's Make it Monday challenge.


I made a sliding inspirational card! I used Mint Julep, Vintage Jadeite, Aqua Mist, and Hawaiian Shores as my background, then sponged on the coordinating ink colors using the Modern Background Stencil.

When you slide it open, it looks like this:


I used the Simply You stamp set for the big you and the "are so beautiful inside and out." Virgin stamp!! I've had this stamp for years, but never used it! So glad I finally had a chance to pull it out :)

The butterfly at the bottom of the card is from the new What the Doodle: Butterfly stamp set. I heat embossed it on vellum using white embossing powder, then used my Hawaiian Shores and Vintage Jadeite inks to watercolor the butterfly. I then used my Wink of Stella pen to give it a little bit of shine.

I just love how it turned out!

I sprinkled some sequence from my stash around the card.

On the inside, I used A Little Inspiration and then stamped the smaller butterfly to tie the inside with the outside and water colored that as well.


I love the way it turned out :) A video to follow sometime this week!!

Saturday, January 16, 2016

My Monthly Hero Heart Shaker Card

Hi all,

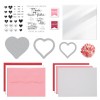
I'm back with a card and video today. The other day I showed you the new My Monthly Hero kit from Hero Arts that I absolutely love!!! Then I showed you some cards I made using the kit. I told you I'd be back later in the week with a video on how to make one of the cards, and here it is. I decided to start with the heart shaker because I wanted to show you how the dies work and how I made the background.


I started this card by rubbing  my inks across a clear acetate piece and then misting them. These inks don't react well with water, but I was still able to get a pretty cool effect from doing this. I toned it down using the included vellum and I love how it just makes a loud background look so soft :)

Next I created the heart shaker part. For my first card, I only went with one layer of foam, but it doesn't shake very well, so in the video I decided to use 2 layers, and it shakes so much better!!! I ran the shimmer white piece through with the scallop heart die and the inside heart die. Then I traced around the outside of the die on foam, acetate, and Blushing Bride cardstock from Stampin' Up. I put the foam pieces on the vellum and filed it with goodies from the sequin mix included in the kit. Then I covered it with the acetate and heart piece.


I wrapped some old Stampin' Up ribbon around the card layer, then glued it to the card base (the pink card that came in the kit). I stamped a saying from the included stamp set as well and that's it! I love how fun and cute this card turned out!


I'm not sure who I'll give this to, but I had fun playing around with my kit and making this card.


Here's the video :)


Thanks for stopping by and I'll see you back here soon!


Saturday, August 29, 2015

Stamp-a-Faire Bridal Challenge

Hey guys!

It's been a busy first week back to school setting up my classroom and going to meetings, but it's finally Stamp-a-Faire day!! My friend Betsy came over and we are already hard at work on some of the challenges. We got a little bit of a late start so we are just finishing up the bridal challenge, so we obviously won't get to them all today but that's ok!

While Betsy finishes up her wedding card, I thought I would go ahead and share mine! I really love how elegant it came out! It's a challenge not being able to really stamp anything since its supposed to be all white, but that's where die cuts come in hand! I used my brand new Twig Wreath dies to create the focal wreath on my card. I just layered them around the wreath until I liked it. Then I used a sentiment from the older set Bigger Blooms and I heat embossed it with silver embossing powder. Love it!

Well, I'm off to work on another challenge!

Supplies used:
Stamps - Bigger Blooms, Quilled Elegance (inside wedding sentiment)
Dies - Twig Wreath
Paper - Papertrey Ink Fresh Snow Linen paper, Stampers Select White
Other - Stampin' Up Silver Embossing Powder, My Style Stamps white pearls, Stampin' Up White Satin Ribbon

Sunday, March 18, 2012

Catching up

Hey everyone,

So Andy and I have finished moving! We moved into my sister's condo because she bought a house. I'm super excited about how much room we have now! We aren't all unpacked yet, but we're getting there. I finally got all my clothes put away today. Last time I moved, it took me almost 2 weeks to get my clothes hung up and put away. This time I was smarter about how I boxed them, so that I could just hang them right up in the order I like :)

My craft room was the first thing I unpacked on the Sunday after we moved (we moved Saturday). It's almost all complete! I'm just waiting for some paper storage cubes that I want for my birthday in a little over a week! Then I'll get a video of my new area and post it for you. It's absolutely beautiful! It's soooo big! I have so much more room and everything is so much more organized. We also have a TV downstairs so now I can watch TV while I craft, so I find myself down there more often. I've already made 5 cards this week, plus a video! (Currently being uploaded to youtube) That's a lot more than I ever have time to make. Andy went to Pennsylvania this week to visit his family, so I think that had something to do with it. I had more time to craft since I was all by myself (though I did miss him!)

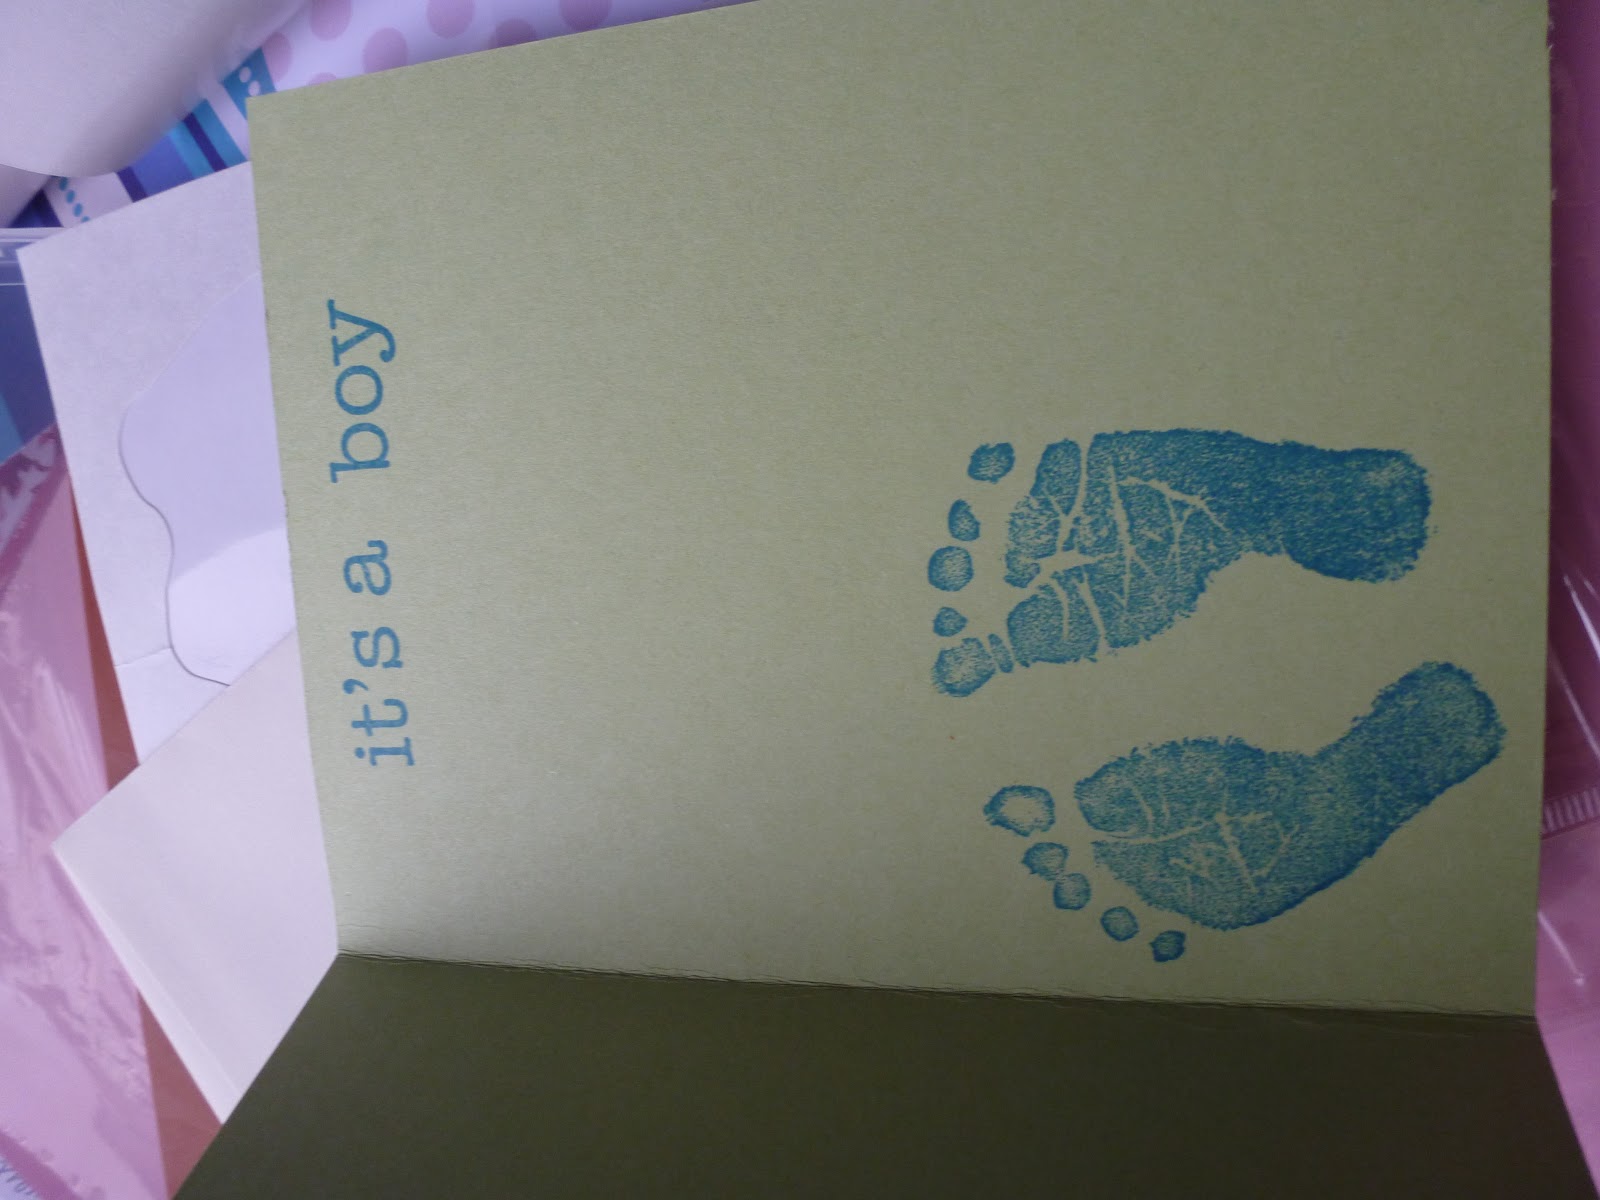
Anyway, I've got so many cards to share with you today. I want to catch up. The first one is a card that I made for our friends Ken and Kelly for thier baby shower. They are having a boy and their theme was dinosaurs.


I used the Create a Critter cartridge to cut the dinosaur. He's cut from all Stampin' Up colors, though I can't remember all of them. The patterned paper is from a DCWV stack, I think either the Baby Boy stack or the Glitter stack. Dino-riffic is from the Boy Crazy stamp by My Pink Stamper. The baby feet as well as the it's a boy sentiment are from the Baby set in the Stampin' Up Occasions Mini. I think it turned out super cute!!

The next card I wanted to share was the card I made for Andy for Valentine's Day! This one was made using mostly Papertrey Ink products. I absolutely love Stampin' Up and all their products, but I've rediscovered Papertrey Ink! They release a new line of stamp sets and dies to match their stamps on the 15th of every month and I've been sucked in! I've bought stuff from the last 3 releases and I'm super super excited for the new stuff that I just bought this week. I can't wait for it to come in :) I ended up spending almost $250... eek! I also bought a lot of new products from thier February release, and I finally got around to actually using some of them, which was a lot of fun. I'll take pictures of those cards and post those ones as well. The card that I'm about to share is made from products from thier January release. I used the Simply Jane stamp set, which is awesome! It also has matching dies and designer series paper.


I stamped the couple from the Simply Jane set using Dark Chocolate ink onto the Dearest Jane designer paper. I then used one of the Papertrey Ink oval dies to cut out the couple. The frame is stamped using versa mark onto Smokey Shadow cardstock and then I used silver (or it could be pewter, I can't remember) embossing powder. I then cut it out using the matching die. I absolutely had to have all of these products as soon as I saw them because I thought they were adorable. I love love love the saying I used from the stamp set (stamped in Vintage Cream), "You  must allow me to tell you how ardently I admire and LOVE you." I thought it was perfect for my Valentine's Day card for Andy. The card base is Raspberry Fizz and I also added a strip of the Dearest Jane paper to the bottom of the front. I think the ribbon is just a satin ribbon from Walmart, but Papertrey Ink has beautiful Satin ribbon to match their cardstock as well. The buttons are dark chocolate buttons from Papertrey Ink.

The inside saying is from a My Pink Stamper Stampset called From the Heart, stamped in Dark Chocolate and Raspberry Fizz ink. Andy loved it :)

The last one I'm going to share today, and I'll share more tomorrow, is the St. Patrick's Day card I made for my niece.


I cut out the leprechaun from Simply Charmed at 3 3/4 inches. I also cut out the lucky from the same page. He was made using both Core'dinations paper and Stampin' Up paper. The orage for his hair is Tangerine Tango, and his legs are basic black. The rest is core'dinations.
I took a 4 by 3/4 inch strip of real red, pumpkin pie, daffodil delight, pacific point, and concord crush for the rainbow. I cut the green one from the same green as the leprechaun. I placed them on a piece of white cardstock, and then ran it through the square lattice embossing foler to make it look more like one piece. I then placed that on a 4 x 5 1/4 basic black layer. I tied a green ribbon around the corner of the black layer and tied a knot. I then glued my black layer down on I think it's a piece of New Leaf cardstock from Papertrey Ink. I popped the leprechaun up on pop dots, but glued down the lucky. I used stickles for his buckle, cheeks, and eyebrows, all matching colors (not the icicle one).

I stamped the inside with the Stampin' Up St. Patrick's Day stamp from the Occasions Mini in Garden Green.


Well, that's all for tonight. I've got tons more to share with you, so I'll upload some more tomorrow. I also have another video to share with you, which I will do tomorrow. I hope everyone has a great night! I'm starting to feel a little under the weather (my through is starting to hurt, I'm getting that achey feeling in my neck, and I'm really tired) but hopefully a good night's sleep will make me feel better... Back to work tomorrow... yay... but it's a short week this week! We have professional development on Thursday and Friday so we only have kids for 3 days. It should be a nice break. Then my birthday is the week after, and the week after that we have 4 days, and then it's break, and ANDY'S BIRTHDAY!!! Yay :)

Good night everyone!

- Ash


Tuesday, March 6, 2012

Established Elegance Video

Hey everyone!

So I thought I'd post that video I was talking about yesterday. It uses the Established Elegance stamp set from Stampin' Up. I absolutely adore this set! It's one of my new favorites!!! I also used heat embossing in this video as well as Stampin' Off. I hope you enjoy it!

Also, Michele came over today to help me pack. We packed up my craft room :( So no crafting for Ashley this week... But grade are due Friday and I have to pack up the rest of my stuff anyway, so I guess it's better that I can't play around with my stuff. My craft stuff will be one of the first things that I unpack when we move into our new place this weekend! I can't wait to have more room! I'm going to buy another table as well so that I have more space to actually work. That way I can also have people come over and work on things in my space too! Right now, if someone comes over, one of us has to work on the floor... Not that I have many people come over right now. Anyway, on to the video!!


Good night everyone!! I'll try to get more pictures posted soon!

- Ash

Wednesday, January 4, 2012

One in a Melon Birthday Card

Hey everyone!

The new Stampin' Up 2012 Occasions  Mini is now available to purchase from!!! Hurray!!! So now I can share all the vidoes I made last week with you! Today I'm showing you a video of the watermelon birthday card I posted last week. This card was for my sister's birthday right after Christmas. It uses two new stamp sets, "Mouthwatering" and "Loved Ones" as well as some new ribbon and new scented embossing powder. I also used a new set of My Pink Stamper Stamps. I hope you enjoy!


- Ashley

Friday, December 30, 2011

Snowman Thank you Card

Hi everyone!!

So I'm back. I haven't been on in a month and now you have 2 posts from me in one day! I just wanted to share a video with you that I made today. I made this card with my students that last day of school before break. They each got to make their own card. I let them pick their stamp sentiment and their cuttlebug folder, but the rest we all had the same. It turned out really cute! You could use this card for lots of different reasons. I have shown you a version that can be used as a winter card that you can send out during these cold months, or as a thank you card.

One of my best friends just donated a table to Andy and me for our new apartment, so I think I'm going to use this card to give to them as a thanks for giving us the table :) Perfect timing on this card!!

Anyway, I hope you enjoy!


I used Stampin' Up paper and Shimmer Paint.
Cuttlebug folder - Snowflakes
www.mypinkstamper.com "Winter Punnies" Stamp set
Papertrey Ink paper and Ribbon
Heat embossing


Andy and I are off to see Wicked tonight! My Christmas present from my baby :) Can't wait! I hope everyone has a wonderful night!

- Ashley

It's been a while...

Hey all!! Wow... it's been a month since I've had the opportunity to post... I've just been sooo busy getting ready for Christmas and doing everything for my students, I was pretty much running around nonstop for about 2 weeks... But now I'm on Christmas break for another week and a half, and I've already got a bunch of videos filmed and ready to post! I just have to wait until January 4th when the new Stampin' Up Occasions Mini ordering starts because I've showed pictures of their new products in my video. I can post the pictures for now though and you can look for the videos in January. I will have some videos that I can post before that within the next couple days though because I've not got lots of time to craft, and I'm super excited to have more time finally!!!

Anyway, I hope that everyone had a wonderful Christmas/Hanukkah and got lots of craft stuff! I got some Cricut cartridges, a crop-a-dile, a big bite, and a Xyron machine. I also got a tripod so now I can film videos much easier for you guys :)

I also got $150 in gift cards to Michales, and I've already been shopping and spent most of it already, though I've got about $38 left still... And I'm going to buy some more Jetmax storage jars for all the Papertrey Ink buttons Andy ordered for me. I've got about 20 packs of buttons coming!! I also have over 20 packs of paper coming from Stampin' Up as well!! I can't wait! And they'll still be here in time for me to use them for about a week before I have to go back to work :)

So I don't go back until the 9th, and Andy has the week off right now, so I've been hanging with him for a bit. I moved in with him on the 10th! So now I get to be with him all the time :) I love it! It means I also have my own craft space now that I'm out of my parent's house. I have a video ready to post that shows my craft room, but I've got to wait :( Also, my friend Melanie was in from Texas for a couple days, so we crafted yesterday and went shopping! I got a bunch of stuff from Michales and Jo-Ann!

Anyway, my sister's birthday was on Wednesday, so I want to show you the card that I made for her 31st birthday! I'll post the video for you next week, but here's the picture.


I used a new stamp from Stampin' Up as well as some new embossing powder.
I also used a stamp from www.mypinkstamper.com
I also used elegant edges to create the background for the watermelon.
The paper is all from Stampin' Up and the patterned paper is from the DCWV Nana's Nursery Baby Girl stack

I'll give you more information on the video
I didn't take a picture of the inside, but you'll see that in my video as well :)


I've got a Valentine's Day card for my niece that I'll post later or tomorrow. Thanks for stopping by, sorry it's been so long.


- Ashley

Sunday, November 27, 2011

Snowflake Card

Hey everyone!

It's almost time for bed... and back to work after a long weekend :( Oh well... I got back from Pennsylvania yesterday, and I went right into my craft room after talking to my parents for a couple minutes, and got back to crafting! I made my very first holiday card :) It's a snowflake card, so it's for any religion. I'm really excited with the way it turned out, and Andy even told me it was his favorite card that I've ever made :)

Anyway, on to the card...


I made 4 different designs and took pictures of them all. I'll post them tomorrow once I've gotten them uploaded onto my computer. I also made a video of the other Thanksgiving card I made. I know Thanksgiving is over, but I still wanted to show this card, and it had to be done with a video, so I'll post that tomorrow :)

Anyway, goodnight all!!!

- Ash

Saturday, November 12, 2011

Card box

Hey everyone! It's been a couple days since I posted, but I had to work on lesson plans Thursday and then I went to the movies last night. Andy, my friend Melanie and I saw the new Harold and Kumar movie last night. We saw the 3D version and it was awesome! The 3D graphics were so good!

Melanie and I had craft day yesterday. I didn't have school because of Veteran's Day. I drove out to Andy's work to have lunch, and then I went to Michaels. They have paper packs on sale for $11.40, so I ended up buying 6 packs I think? Wow... I have an obsession. I was really there to buy ornaments for the Christmas project I'm going to do with my students, but when I saw they were on sale, I just had to get some. I got a couple glitter packs from DCWV that are different from their newest one. I also got a shimmer stack in new colors, a patterned cardstock pack and then 2 of the 180 patterned paper packs. When I got home, Melanie came over and we had so much fun! I finished up one set of my Thanksgiving cards, which I'm so excited to show you! However, I have just discovered that my camera memory card adaptor does not fit in my new laptop, so I'm going to have to get a new one or something so I can upload all the pictures I've taken of my new crafts :( I also made a video and took a bunch of pictures of the 3x3 mini notecard boxes that I've made... I will try and upload some of those tomorrow. Melanie fell in love with the mini notecard boxes and decided to make a set of her own yesterday while I made the Thanksgiving cards. Her's turned out really cute for a first attempt! She loved them so much we went to Joanns yesterday and she bought a bunch of paper packs too! Hahaha! I bought two more packs from there because DCWV came out with some new packs that they just put out yesterday! It's called the Creamy stack, and it's so nice and smooth feelings. It's got a bunch of bright colors in it that I can't wait to use. I also bought the chalkboard stack, and I think it's paper that you can actually write on with chalk. I just liked the texture and colors so I bought it. She also bought the Martha Stewart Score board so she could make the boxes! Haha, I love to bounce ideas back and forth with her.

Anyway, my mom and I went back to Joann Fabrics today to get some interfacing to make a purse that my Stampin Up demonstrator showed me. I'm so excited to try sewing for the first time!! My mom is going to help me though... It's so super cute! I'll post a picture when I'm finished and add a link to the blog I got it from.

Ok, so on to the crafts... I made this box for my friend back in the beginning of October for her birthday. I included 4 different types of cards in it, with 5 of each. I'll post the box and then a couple of the cards. I'll post the rest later.


The flower is from an imagine cartridge, though I can't remember which one... I'm going to guess Lori's garden.
The letters are cut from the Hello Kitty Font cartridge, and I used the imagine to fill them in
The tag is cut from the close to my heart art philosophy cartridge
The paper is from the DCWV All Dressed Up stack and I love it!!


This is one of the cards I put into her box. I made two different sets of Monogram cards for her and this is one of them. The white layer is from the Core'dinations pearl pack and the blue top later is from the DCWV Shimmer stack. I can't remember which cartridge I used to cut the scalopped circle on the front... But I used Storybook for the K, so it might have come from there.
On the inside, I stamped an image using the versamark ink and then I heat embossed the image to give it some shine.  I thought it gave the card a little more so it wasn't so plain.

Ok, so that's it for now. But I will try to get those other pictures loaded on my computer and I'll post the other 3 cards from my box for my friend Kelly.

- Ash