I recently ordered the new Papertrey Ink Moments Inked 2016 planner with my December Papertrey Haul. This year, I decided to go with the binder format and the beautiful white binder option.
Let me tell you... I AM LOVING!! my new planner! Now, I'm not really a planner person (or so I thought....). I used my planner a lot when I was in high school and college, not only for school stuff, but also to write down things I did each day so I could remember when I went and saw certain movies, hung out with friends, etc. But after college, I bought a couple planners here and there thinking I would use them, and they just fell by the way side... Poor planners!
Then last year, Papertrey Ink designed their own brand new line of planner stuff as well as a beautiful planner to go with it. I absolutely loved it and decided to take the plunge and order it (I thought it was a little expensive, but it was around the same price as most other nice planners). I used it for a while, maybe about a month, to it's full potential. I wrote in my daily pages, used the weekly pages to keep up with things throughout the week, and then used the monthly view to keep track of important dates. Then I just got too overwhelmed by the planner and stopped using it. I hardly ever used any of the PTI stamp sets I bought to go with my planner, making them pretty much worthless for a while.
Then school started back up in August, and I started using my planner again to try and keep myself on task for all the work things I had to do. But again... after a while, the planner became daunting, and I stopped writing in it.
I love the idea of a planner, because I can use it as a memory keeping item (to see when I did certain things), but duh, it's also useful to help plan! I have a lot going on with school and friends and family, and sometimes I would forget things that I had going on... (like missing craft club or book club, and those kinds of things... whoops...)
So when Papertrey Ink introduced their newest planner options for 2016, I knew I just had to have it and I had to make it a goal to actually use my planner this year.
I am seriously loving my new planner. I really truly am going to make it my goal this year to make sure I am using my planner and keeping my life organized. I want to try and use a lot of the stamps and things that I already have in my craft room to keep my planner decorated and fun, but I'm already finding a need to search around on Etsy for some specific stickers that I want... Like movie going stickers, since my hubby and I like to go to the movies! I don't have any movie stamps so that won't work! I've already been shopping around on Etsy and have found some cute stickers that I plan on getting - but not going wild with it.
I did a video to show what I've done with my new Papertrey Ink Moments Inked 2016 planner as well as give my opinion on what I like and don't like about it. There are still some things about the new planner that I need to figure out, such as how to break up my day between home/work/school, and where I can write all my daily memories that I liked from the daily pages. I've heard that PTI is going to release some new dies to coordinate with the new binder planner as well as a new option for daily pages that you can include in your planner if you wish. I'll have to keep my eyes open for that as their new release comes up this month.
Anyway, here's the video that I created to show off my new Moments Inked planner. I didn't do too much comparing from last years; you can check out Nichole Heady's blog to see more detailed posts about the new planner.
I also took a bunch of pictures to show you up close what I've been doing with my planner.

Here's the cover of the white binder. Doesn't that just look so gosh darn professional?? I absolutely love it. I know I'm not really in a business type setting where I work, but I still think it will be perfect for work :)

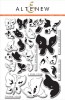
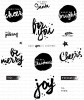
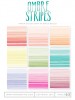
As I said in the video, one of my favorite parts about the spiral bound version was all the beautiful covers they released to go on top of it. I was disappointed that the binder version didn't come with some covers that you could purchase as well to stick at the front of your binder. I decided to create my own using inspiration from a recent planner addition that Audrey Takoch shows here. I just love the Papertrey Ink Brushed Off Set. It's beautiful!! Look at all the yummy rainbowness as well. Love :) I decided to dress it up with some Painted Butterflies from Altenew as well.

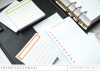
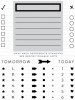
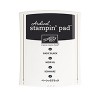
Papertrey Ink decided to carry white post it notes as well this year, so of course I picked those up so I could stamp out some notepad lists using my Moments Ink: Posted Stamp Set using the Papertrey Ink colors incorporated into the planner itself. No more trying to create my own post it notes from other papers, or using bright neon post its!

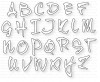
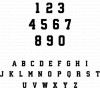
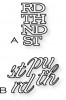
During this last week, Paperytrey Ink Moments Inked Design Team members were sharing their throughs and reviews on the new planners from PTI. I saw Amy Sheffer's post where she showed her name using the Wet Paint Alphabet Set and luxe gold adhesive paper, and decided I wanted to do that too! However, my favorite color is purple, and I wanted purple glitter paper, so I took and inked Winter Wister on some Fresh Snow Linen paper, cover it with versamark, and embossed it with my iridescent ice embossing powder from Stampin' Up. I cut it out using the Wet Pain Alphabet Dies as well. I just love how that looks in the front of my planer :)

I haven't filled out my goals for the year yet. I'm still trying to think of them. I'm going back to grad school this month, so finishing some classes this year and renewing my teaching certificate is pretty high on my goal list this year. I also want to try and spend more time with my crafting outlet - not just crafting, but spending more time creating videos and posting in my blog. My blog always gets left behind when I don't have time, and I want to really try and make it a goal of mine to post more crafty videos (not just hauls) on youtube and to create coordinating blog posts. For example. I already uploaded the video for this post days ago, but just now decided that I wanted to write a blog post about it. I got a new computer for Christmas, so I'm super excited to use it for school and the crafty social media world. I'm hoping it wil help me keep up with everything. I also want to try and save some money this year. Andy and I have been talking about trying to have a baby sometime soon, and we are going to need a lot of money for that... so I need to figure out how to only buy what I need... And stop buying soooooo much new crafty stuff. I also haven't been reading as much lately, since I've basically become obsessed with crafting, so I want to try and get back into my reading as wel.
Anyway, I digress. The reason I took this picture was to show you the beautiful planer card I bought from Kristina Werner. You can purchase the download for 4 planner cards that you can foil. I love them and I think they look beautiful in my planner. I also used one in the cover, shown in the picture above. You can get to Kristina's shop here.

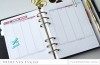
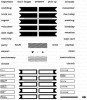
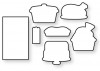
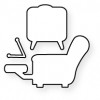
Here is the first week in my new planner. I did a bunch... I know I won't be able to do this much when work starts up again and I start grad classes, so I wanted to do a bunch of things now! My sister's birthday was on Monday so used the Foodie Fun Stamp set and Confetti Toss from Papertrey Ink, as well as the Sweet and Simple Alpha Dies from Taylored Expressions. We also went out to dinner with friends on Tuesday night, so I used Foodie Fun to cut out the cooker as well as stamp the saying "Dinner is better with friends."
The picture you see there is a picture of my niece Riley. I want to make sure I write down something important, or something memorable for each day, and if you read on the left hand side, my memorable thing for the 28th was that my sister put Riley in the outfit I bought her for Christmas and sent me a picture. I think she is absolutely the most adorable thing known to man kind and I loved that Lori put her in the cute little outfit I bought. So I decided to print out the picture, laminate it, and then punch some holes in it so I could include it in my planner. I don't plan on including a picture every week, but I do want to try and put some memorable photos in there so that I can go back and look at them another time and remember what I good time I had.

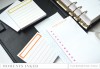
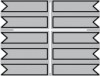
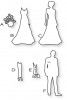
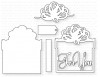
Here is the second half of the week. On Wednesday, I went bridesmaid dress shopping with my friend who is getting married in June. I knew that she wanted us to get purple dresses, so I cut out the wife from the Man and Wife die (PTI) in Fine Linen, and then I cut out her dress in Winter Wisteria.
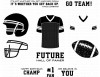
On Thursday (New Year's Eve), MSU played Alabama in the Cotton Bowl, so I used Football Frenzy and Football Frenzy Addition stamp sets from PTI to create the football jersey with Connor Cook's number, the football, and all the sayings. I used the addition stamp set to stamp out MSU vs AU and GO GREEN! I used the Football Frenzy stamp to put "#1 Fan" and "We believe in you." MSU totally sucked it up and played an embarrassing game of football! But I still love my Spartans and am a Proud MSU fan everyday.
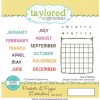
Now, since I had basically covered up New Year's Eve with all my football stuff, I had to put my New Year's stuff on actual New Year's Day. I saw the layout Amy Sheffer did in her earlier linked post and wanted to create something similar. So I used the Wet Paint Christmas Tags, Star Scribbles, and Christmas Cheet to stamp out Cheers, and Happy New Year. I don't remember which stamp set I got the hello from at the bottom, but the word January is from Taylored Expressions Pockets & Pages Calendar Stamp Set. I used the Wet Paint Numbers dies to cut out the 2016 at the top. I didn't use a lot of colored cardstock when making the stuff in my planner. Since PTI used the Fresh Snow Linen paper to create the pages of the planner, I decided to use the linen paper on the majority of my die cuts too. The 2016 was inked with differnet colors on the linen paper and then cut out.

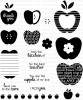
So far, I don't have much going on the 2nd week of January. We go back to school on Monday so I used a retired Stampin' Up Stamp to stamp the little bus. Then I used Teach & Inspire from PTI to stamp the saying at the bottom. I used the Apple Prints Stamp Set to stamp the apples along the bottom of the pages.

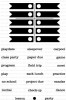
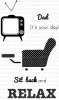
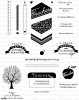
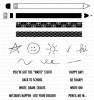
For the 3rd week of January, I decided to use more teacher stamps to show going back to school. I used the Teach & Inspire stamp set to stamp the tree and apple as well as the saying "From Little acorns, mighty oaks do grow." I also used to to stamp the alphabet at the bottom, and the ruler at the top. The pencil comes from the stamp set as well. I used the Pencil Me In stamp set to create the squiggle line, as well as the "You've got the write stuff" saying at the bottom. The TV is cut out from Polka Dot Parade #3 to show that Pretty Little Liars comes back on TV that day.
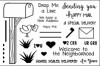
The envelope on Sunday comes from Hero Arts Acts of Kindess and the heart 2 CR8 comes from the Stamps of Life happymail2stamp.

I didn't really have anything going on yet for this week that I know of, so I decided to pull out the PTI December freebie One Big Happy Stamp and Die set to create this lovely floral spread. I just love this beautiful flower stamp. I'm so glad I was able to snag it :) It just makes me happy to look at it!

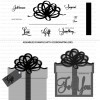
Here's the last week in January. It's my niece Riley's 1st birthday as well as her party! I decided to go all out for it since it was her 1st birthday. I used Enclosed: Present to create the focal point. I used Scene It: Celebration to create the star clusters around the present. The letters are cut out using the Wet Paint Alphabet and Number dies. I used Suffix Style to cut out the "st." I also used the Birthday Style Stamp to create the streamers going across the top of the pages.

One thing I loved but also didn't like about the old planners from last year was the daily pages. I loved the idea of keeping a sort of journal with your planner to help you remember what was important about each day. However, I thought the daily pages were kind of dauting because there was so much on it and I felt like I had to try and fill the whole thing out. That's why I stopped filing them out. I was a little disappointed, but also happy to see the daily pages gone this year. I'm sad though that there isn't a specific space to store your memories of each day in the new planner. For the first couple days of my planner, I had room on the notes section to include my daily memories. But then I wrote too much and ran out of room. I'm not quite sure how I'm going to do it going forward, but at the back of each month there are a couple extra lined note pages where you can put whatever else you need. I deiceded to use it as a spot to put my daily memories for now. I'm wondering if PTI will come out with something to replace this, but for now I'm going to try this. However, I had to much to say for 2 days and I'm worried i'm going to run out of space!! Ahhh!!! Any suggestions?

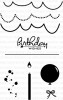
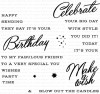
I haven't really gotten around to doing much else with my planner yet. I plan on stamping out some stuff for February, but I just haven't gotten around to it yet. I'm going to try and start working on it next week sometime. However, the most important thing I had to work on was my birthday of course! My birthday falls on Easter this year (bummer... that happened when I turend 18 too. I don't like when birthdays are on the same day as holidays because then you only get 1 day of celebration! Ugh! lol) I used Scene It: Celebration and Birthday Cheer from PTI to create the little scene. Then I cut out my name and age using the Wet Paint alphabet and numbers dies.
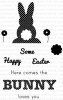
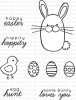
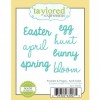
Now since my birthday was on Easter, I also had to decorate it for Easter as well. I used Taylored Expressions Pockets & Pages April Script to cut out the Easter saying. The bunny is from PTI's Polka Dot Parade #1 and the eggs are from Hippity Hoppity.

For right now, I think I am going to use this as my bookmark for my planner. It's another one of those cards from Kristina Werner's shop that I turned into a shaker pocket using my WRMK Fuse Tool. I love the way it looks in there :)

Isn't she beautiful?? I can't want to see where the year will take me :)
Thanks for sticking around to the end of this long and photo heavy post. I hope you enjoyed getting a chance to see into my planner life and the things I plan on doing. Bye all!!


No comments:
Post a Comment