Monday, August 6, 2012

Stampin' Up Craft Club

Hello everyone!

So the day after Stamp-a-faire was our monthly craft club for Stampin' Up. Not only is Michele one of my good friends, but she is also my demonstrator (even though yes I am a demo myself, I love being part of her club and going to her classes!). We stamped together all day Saturday, and then I went over to her house on Sunday to do our club projects! This month I was the hostess, and I got tons of free goodies!! Michele let me help pick the club projects this month. A while back I had seen a video on double embossing (found here) and told Michele that I'd like to try doing that in club sometime. So since it was my month, she decided it was the perfect time to try this technique! She did it a little differently than the way shown in the video, but I still think the cards turned out beautiful :)


Supplies:
Stamps: Postage Due
Ink: Versamark, Island Indigo, Crumb Cake (to sponge the outsides)
Cardstock: Island Indigo, Pink Pirouette
DSP: Fan Fair
Ribbon: Pink Pirouette Taffeta, Victoria Crochet Trim
Embossing Folder: Vintage Wallpaper
Clear Embossing Powder
Punches: Postage Stamp, 1" square
Other: Brayer, Big Shot, Dimensionals, Sponge


For the next card, Michele showed me a ton of cards she made one day while she was working on crafting stuff. I saw it and fell in love immediately! It's so simple, yet so beautiful at the same time! I told her we had to do this card for club, which was perfect because it uses all the new In-colors as well as the new In-color Ink pads (which are also a new kind of pad). This is a single layer card and was very easy to finish and would be easy to mass produce.


Supplies:
Stamps: Papaya Collage, One in a Million
Ink: Raspberry Ripple, Primrose Petals, Summer Starfruit, Gumball Green, Midnight Muse
Cardstock: Whisper White
Other: Basic Rhinstone Jewels

The last card is a technique that I found on youtube not too long ago, and has since because super popular. You can find the original video from Dawn Olchefske here. Michele came over one day to hang out and craft, and I made a card using this technique using the balloon from You're Amazing. Here is my first attempt at this technique:


Michele thought this was a cool technique and we left it at that. She  might go home and try it sometime.

Now, for the month of July, Stampin' Up had this special promotion where if you spend $50, you can get this stamp set called Reason To Smile for $5. You can find the flyer for this promotion here: Reason to Smile Flyer. Michele decided we should probably use this stamp set in our July club to put it out there to show the girls since it will only be available to customers in July. Then she saw a beautiful card on our demonstraor idea website that used both the Reason to Smile stamp and the Triple Time Stamping technique. Voila, there was our last card for club! So here is the last card we made at club this month:


Supplies:
Stamps: Reason to Smile, Bring on the Cake
Ink: Wisteria Wonder, Elegant Eggplant, Lucky Limeade
Cardstock: Whisper White, Wisteria Wonder
Other: Wisteria Wonder Bakers Twine, Vintage Faceted Buttons

Lastly, we made a Patriotic themed Scrapbook page, and it turned out awesome! I haven't added any pictures yet, but here's the page layout that we did.


If you like the projects you see, and would like to be part of Michele's Club, or would just like to find a Stampin' Up Demonstrator, please check out my friend Michele. You can find her website here.

Thanks for stopping by!

- Ashley


Monday, July 30, 2012

Papertrey Ink Stamp-a-faire - Wrap Up

Hello everyone!

So here's my last post for Stamp-a-faire. It's my wrap up post. After Michele and I finsihed up our clear overlays from the homemade embellishments challenge, we decided to do one last card. Now this card is not from Stamp-a-faire, but Michele and I both loved it and both wanted to remake it! We picked a card from the July stamp release that had a lot going on with it, but we were both up to the challenge. It was created by Nichole Heady, and the original post can be found here.

Here is my card:


Ink: Soft Stone, True Black
Cardstock: Stampers Select White, Soft Stone, Pure Poppy, Orange Zest, Harvest Gold, New Leaf, Blueberry Sky, Clear Cardstock
Die: Mat Stack # 3, Layerz Mat Stack # 3, Heart-2-Heart # 6 Die Collection
Embossing Folder: Polka Dots (Cuttlebug)
Glue Dots

I love the way it turned out! I think that I should go back and add the rainbow dots to the back of the clear cardstock to cover the glue dots from the ones in front... however, it was 11:30ish by the time we finished this card so we just gave up at this point. I still love it lol, Nichole is so creative!

So there you have all the things we did on Stamp-a-faire day. I have some other projects that I made using Stamp-a-faire techniques, which I will post soon.

Thanks for stopping by!

- Ashley

Wednesday, July 25, 2012

Papertrey Ink Stamp-a-faire - Homemade Embellishments

Hello everyone! I'm back with another Stamp-a-faire post! This time I'm going to show you the homemade embellishments that Michele and I chose to do. (View the original post here)


Ashley's handstitched embellishments are beautiful, but it was getting late at this point (probably about 9:30) and they would have taken too long to complete. I love Heather's felt badge embellishments, but I don't have any needles in my home nor do I have the circle dies so I couldn't have cut felt circles :( I will have to maybe invest in those even though they are pretty expensive... We also loved the way Danielle made washi tape from PTI's patterned paper, but we didn't get a chance to do that one either. I will definitely be going back to try all of the ones mentioned so far when I get a chance! Dawn's butterfly embellishments were beautiful and I'll need to make those for some cards soon too, but as soon as we saw Jessica's video we were in love! We stopped everything right then and there to try her technique! I was so glad Michele had white staz-on, because I don't... But I loved this technique so much that I purchased some at Stampin' Up craft club last weekend (more on that in another post though...)

I didn't have the same background stamp that Jessica used, so Michele and I picked different stamps. I chose to use the Twinkle stamp set and Michele used the Wrought Iron stamp set. We were a little nervous at first because you can't see the clear cardstock and it's hard to line up the stamps just perfectly when you are trying to do a couple rows of the background stamp, but we got over our fear and plunged into our stamping! We copied Jessica's card pretty much exactly except for the background stamp on the overlay. What can I say, she has a beautiful card!

Here's my card:

Here's Michele's card:


Yup, beautiful! So I bought my own white Staz-on so I could do more of these!

Supplies:
Ink: True Black, Berry Sorbet, White Staz-On
Other: Pinking Shears Decorative Scissors

Thanks for stopping by!I'm going to try the other embellishments soon as well, including Betsy's rosettes and Melissa's felt bows :) I've got some more projects to share with you still and a couple videos that I'm going to be posting as well! I'm really excited about this project :)

- Ashley

Monday, July 23, 2012

Papertrey Ink Stamp-a-faire - Card Set Challenge

Hello everyone! I'm back with another Papertrey Ink Stamp-a-faire post! I told you Michele and I had a ton of fun stamping this weekend!!!

The next challenge we tried was the Card Set Challenge.


I thought Jessica Witty's Glassine Bag/Embossed Card set was genious! Unfortunately we didn't have two different sized Glassine bags, but just the one size. I also don't have a sewing machine at my house since I don't know how to sew. So we decided we would wait to do hers until we could get more Glassine bags and would be able to sew them! But I definitely will be trying hers!!

The next video we watched was by Danielle Flanders. We watched it and fell in love, so we decided we had to try hers! She created a card set using a Nugget Tin! Here's the link to her tutorial. She gives you step by step how to create these beautiful mini cards and a housing for them.

Michele and I decided to do ours almost exact to her's, but changed up the colors a little. Michele used Sweet Blush for her background like she did, but used Hibiscus Burst for her sentiments. I used Pure Poppy for my sentiments like she did, but used Summer Sunrise for my backgrounds instead. We also used the same stamp set.

Here's a picture of the cards inside. We only made 5, but I can always go back and add more to the set if I want. We were trying to conserve time by making less. 

Here's a picture of the outside of the tin. You can see the cute little cards on the inside through the clear lid. I love it!! What a cute gift to give to someone!


Supplies:
Stamp - Half & Half
Ink - Summer Sunrise, Pure Poppy
Cardstock - Stampers Select White, Pure Poppy, Pure Poppy Pattern Pack
Die - Half & Half Die Collection
Ribbon - Summer Sunrise Saddle Stitch
Tin - Nugget Tin
Envelopes - Stampin' Up Mini Square Envelopes (3x3)

We watched the other three tutorials, but did not have a chance to try them out. I will be going back myself this week and trying them! How exciting to have so much to stamp!!

I hope you liked my cute little gift card set!

- Ashley


Papertrey Ink Stamp-a-faire Limited Supply

Hello everyone!! I'm back again!! Again, these are posted out of order, this one should have been before the Tie Dye technique, but I accidentally posted them wrong. After we did all those beautiful ribbon cards, Michele and I moved on to the Limited Supply challenge. We both would like to go back and do some of the mini books, but we just did not have time on Saturday to do them. We stamped for over 12 hours and still didn't have enough time in our day, lol. But Andy is gone all week, so I'll have plenty of time this week to stamp :) I'm going to go back and try the mini books! But anyway, we both decided we were going to try the limited supply challenge.


These were the guide lines for this challenge: (Entry post can be found here)

Your challenge is to create a project using the limited supply list provided below. You can choose to re-create one of the designer projects or design something all your own.
These are the specifics that were provided to each of the team members. You can use as many or as few as you like and any inks you prefer. You may also add in dies, twine or glitter if you desire. Please do not use any other products besides those listed below, however you can substitute the Natural Beauties stamp set for another floral set if need be.
  • STAMPS: Natural Beauties only (or another floral set as a substitute if needed)
  • PAPER: Stamper's Select White, Hawaiian Shores, Aqua Mist, Simply Chartreuse
  • RIBBON: Hawaiian Shores Bitty Dot
  • BUTTONS: Simply Chartreuse
The design team came up with some beautiful cards that I will definitely be going back to recreate (as soon as I buy some Hawaiian Shores Bitty Dots Ribbon!!) There were a couple that we loved, but we decided to pick one to recreate and then use the rest of our supplies to create our own challenge card. We decided to pick Nichole's card to do first. She did a tall card, but we decided to make it into a standard A2 sized card. Go to the post linked a couple lines up to see the specifics of her card.


After we did her card, we set out to make our own. We both made two and then swapped one so now we each have two different cards! We weren't allowed to peek at each others' projects until they were done. I love the way Michele's turned out! It was completely her style, lol, and mine turned out completely my style. We used the exact same materials and came out with completely different cards!


This one is the card that I created! I love it :) I'm going to make more of them to put in my stash! But I ran out of ribbon as I was making the second one to give to Michele, so I gave her the completed one (in the picture below) and kept the one that still needs the knot. I will be ordering that ribbon probably tonight or this week so that I can finish my card, make more of this one, and make the rest of the beautiful cards that design team created!

Supplies:
Stamps - Natural Beauties (Only available with purchase of Stamp-a-faire kit or free if you spent $100 on Stamp-a-faire day. In other words, this set is no longer available :( It's a shame because it's such a beautiful set with so many layers, but I'm glad I have it!!)
Buttons - Simply Chartreuse
Twine - Stampin' Up White Bakers Twine
Other - Corner rounder, sponge

I hope you've been enjoying my posts so far! I've still got more to post, so watch out for it!

- Ashley

Papertrey Ink Stamp-a-faire - Tie Die Technique

I'm back with another Stamp-a-faire post!! I posted these out of order, but that's ok. In the afternoon, Nichole shared her Tie Dye techniques with us. We weren't as interested in the one she did using the ink pads and sponges, though I think I will try it later on. I am interested in trying her copic marker technique, but Michele wasn't as interested in that one. However it's ok that we skipped those two because the shaving cream technique just blew both of us away!! We couldn't believe something so cool was possible! So we immediately got to work on trying this one. I stole Andy's shaving cream from the bathroom (with his permission of course), grabbed a cookie sheet from the kitchen and we got to work! I decided to use the same two colors Nichole used in her tutorial, New Leaf and Hawaiian Shores refills because I had ordered them specially for Stamp-a-faire (I'm really bad about picking up the refills... They aren't that much fun to buy so I usually collect them a little at a time over a long period of time... but now maybe I will have to get a couple more to try this technique with more of their beautiful colors!) Michele decided to use Pumpkin Pie and Rich Razzleberry from Stampin' Up because she wanted to do sort of a Halloween theme and I had those reinkers.

We both did 2 cards the first time, then pulled the cardstock out and watched the magic happen! Michele kinda smushed all her colors together, and wasn't happen with the result when she tried to create another card layer from the remaining shaving cream. I added more reinkers to mine and then added another color to try to revive my shaving cream so we didn't waste so much, and I was able to get about 3 more layers out of mine before I decided it was time to quit and actually make a card. I really liked Nichole's card construction, so I decided to do something similar. I decided to use my brand new Sweet Life stamp set to finish off this card.  

Supplies:
Stamps - The Sweet Life
Embossing Powder - White
Bling - Stampin' Up Basic Rhinestone Jewels
Other - Shaving Cream, paint brush ends to swirl the inkers

I absolutely love my card that I created! I have to finish making more with the other layers I was able to get from this.

Michele hated her card, but I like it. But since she doesn't like it, I won't post it :)

More to come!

- Ashley

Papertrey Ink Stamp-a-faire - Ribbon Techniques

Hello everyone! I'm back with another Stamp-a-faire post!! The first challenge was the ribbon technique challenge.


Michele and I decided to try a couple of the challenges. The first one we did was Melissa Phillips grosgrain ribbon technique. You can find her post here. We skipped the first one she showed, but did the other two. We made a card similar to hers, but changed around some of the colors, patterns, and flower die (since I don't have the one she used). This first picture is the knotted ribbon technique (the third tutorial). I absolutely loved the way this one came out! I will have to try it again, but maybe with a different flower die. I just love the way the felt looks on a card! I made Michele use felt too, and I think I made her love it :) I hope... Lol
Supplies:
Stamp - Think Big Favorites # 18
Ink - Dark Chocolate
Paper - Kraft cardstock, Simply Chartreuse pattern pack
Ribbon - Simply Chartreuse Grosgrain
Die - Frilly Flowers Die Collection
Button - Simply Chartreuse
Felt - Vintage Cream, Melon Berry, Raspberry Fizz
Here is the second technique she showed us. This one reminds me of a present bow :) I wish I could have placed the ribbon leaves closer together, but with the way the flower is, it wasn't possible. I still liked the way this one turned out though. The only thing different about this one is that we used the Melon Berry pattern pack instead of the Simply Chartreuse one. We also used a Melon Berry button instead as well.

The next tutorial we tried was Erin Lincoln's Twill Tape ideas. I absolutely love love love this technique!! I will definitely be trying it again with some other colors... I have to purchase some other colors as well, but I also saw someone do a beautiful butterfly using the swiss dots ribbon, (Here) so maybe I will try that as well. Michele and I decided to do butterflies for our card, though we used the same color ribbon that Erin used. I think this was my favorite card that I made all Saturday, though I do love all the others I made too, lol.

Supplies:
Stamps - Beautiful Butterflies and We Go Together
Dies - Beautiful Butterflies Die Collection
Ink - Sweet Blush, Autumn Rose, Scarlet Jewel
Paper - Simply Chartreuse Cardstock and Stampers Select White Cardstock
Ribbon - Sweet Blush Twill, Autumn Rose Twill, Scarlet Jewel Twill
Button - Simply Chartreuse
Twine - Stampin' Up White Bakers Twine

The last technique that we had time for was Dawn McVey's bow tying tutorial. The idea was that you had a finished card that you would add a bow to, however, Michele and I didn't have any cards on hand that needed bows and we fell in love with her color scheme and layout. I do not have a thing for Papertrey Ink's Melon Berry color, but I think it is beautiful paired with Raspberry Fizz! So we decided to just create Dawn's card. We switched out the stamp set because I don't have Mat Stack # 5, but I do have Mat Stack # 3. Although I do have to admit that after watching her show how to tie a bow and a knot, my bows look so much more fluffier and sit a lot better than they did before. I'm happy that I was able to use this tutorial to help me. Here's the card we made - beautiful!

Supplies:
Stamps -  Mat Stack # 3
Bling Mesh

Michele and I didn't get a chance to try Betsy's Bitty Dot ribbon technique, but I am definitely looking forward to trying that. I only have 1 color of Bitty Dot Ribbon right now, so I think I'm going to order a couple more colors and then try it when I get my new ribbon :) I am also planning on trying Michelle Wooderson's Swiss Dots Ribbons strips technique (Now I have tons of colors of this ribbon because I love it :)...)

Ok, so that was most of our morning... we got kind of far behind. Oops! But it was so worth it!!

Thanks for stopping by :)
- Ashley

Papertrey Ink Stamp-a-faire

Hello everyone!! I've got several posts to share with you today!

Saturday was Papertrey Ink's first Online Stamp-a-faire and I participated! IT WAS SO MUCH FUN! I can't wait to do it again next year :) Michele came over around 9 in the morning and didn't leave until about 11:45 or so. We did so many projects and we didn't even get to do half of them!! I'm planning on going back over the next week and doing the ones we didn't get to. I'm excited to have so many fun cards!

We started off in the morning doing the make & take with the stamp set Natural Beauties. Michele and I followed Nichole Heady's card exactly.


So beautiful! You can find the link to her video tutorial here.


That's it for the morning make & take. I'll be back in a couple minutes with the next post!

- Ashley

Tuesday, June 26, 2012

Michele's Retirement Party

Hello everyone,

I have sooo much to catch up on, I'm sorry! But now that school is over, I have a bunch more time and I want to make sure I show everything I've been working on.

The new Stampin' Up catalogue went live on June 1st. Michele had her retirement party on the 6th to sell her retired stamps and showcase some of the new things. I bought a ton of her retired items as well as placed a huge order from the new catalogue from her.

She had a Make and Take available for us to do. It used a bunch of the new in colors and a new Stamp set called Papaya Collage.


She also had a nice little gift for each of us who registered :)


It was filled with chocolate, yum! Thanks Michele!

She also held her June class on the same day. These are the projects we made!


Michele hand cut all the apples and chalks!! Wow! Michele's the best!


Michele had these already made for us :) So we didn't have to struggle with making the rosettes and gluing them!


We made a little notepad!


 A gift card holder! This is so super cute! I wish I had kids that had teachers to give this to, lol.


And last we made a coaster :) We used Mod Podge and Crystal Effects to make this.

If you love these projects, you should think about joining craft club or coming to Michele's card classes if you are in the Detroit area! Here is the link for her website: http://www.stampinup.net/esuite/home/michelebarker/

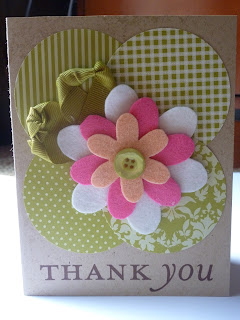
Michele also took the time to make each of us a thank you card for coming to her retirement party. Here's the card she gave me (I love it!!)


Thanks for taking time to look!

- Ashley

Sea You Soon

Hello everyone,

Here's another video I filmed today! It was made using the Turtles2Love Stamp set from The Stamps of Life and Surf Sea Glass from Mudd Puddles.

Stamps of Life: http://www.stephaniebarnardstamps.com/index.htm
Mudd Puddles: http://www.muddpuddles.net/
K Andrew Designs: http://www.kandrewdesigns.com/

Enjoy!


- Ashley

Happy Hexagons and Lovely Layers

Hey everyone,

So as promised, here at the pictures of cards I've made using the Happy Hexagons set from Papertrey Ink as well as some other their other new stamps from the June release. I'm loving my PTI stamps!!

This is CASed from Nichole Heady's blog. The original post can be found here. I added Royal Velvet satin ribbon and some basic jewels from SU.


This is CASed from Nichole Heady's blog. The original post can be found here. I added the Notched Flowers die cut in Simply Chartreuse and Pure Poppy felt, added a Summer Sunrise Button and then a pearl from SU to the center. I also added Real Red 1/8 in Taffeta Ribbon.


This is CASed from Nichole Heady's blog. The original post can be found here.


This is CASed from Nichole Heady's blog. The original post can be found here.


This was made using Royal Velvet cardstock as well as a patterned pack from Recollections that I picked up from Michaels. I used the We Go Together Stamp set from the June release.


I used the following colors for this card: Pure Poppy, Orange Zest, Harvest Gold, New Leaf, Blueberry Sky, and Royal Velvet. The sentiment is from the Movers and Shakers Stamp set. I also added a Hibiscus Burst Button and some pink bakers twine. I finished the card with some Bling Mesh that I found here.


I used the following colors for this card: Winter Wisteria, Raspberry Fizz, Hawaiian Shores, and Harvest Gold. I used a sentiment from the Simply Jane stamp set. I added some Raspberry Fizz Pattern Cardstock to the side. Lastly, I cut 3 flowers out of the Die-namics MINI Rolled Roses from My Favorite Things. I used Hawaiian Shores, Raspberry Fizz, and Vintage Creme felt from PTI.


For this card, I used the same colors as the one above, but I just stamped on the cardstock instead of using the cutout hexagons. The sentiment is from the Think Big Favorites #17 that was just released. I stamped in Royal Velvet on Winter Wisteria cardstock. The flowers are from the Happy Hydrangea Stamp Set, and I cut them out using the matching dies. I stamped them in New Leaf, Winter Wisteria, and Raspberry Fizz ink. I added some Harvest Gold satin ribbon to finish off the card.


This is CASed from Betsy Veldman's blog. The original post can be found here.


This is CASed from Nichole Heady's blog. The original post can be found here.


Ok, that's it! Those are all the cards I made using the new Papertrey Ink items! I hope you enjoyed, and thanks for looking!!

- Ashley