Monday, November 28, 2011

Turkey Card

Hi all!!!

I've got another card for you :) Here's the video I took of my Turkey card for Thanksgiving. Yes, Thanksgiving is over, but I don't care. I still wanted to show you the card because I'm proud of it!

Anyway, I had a really awful day at work today. My students acted out so much today, and it made me feel like I was a terrible teacher... I hope it was just because it was the day after a break.... Hopefully they will be better tomorrow... Second, the last tadpole that I had left looked really sick today... He was upside down when I got to school this morning, but when I looked closed, he was still breathing... My dad came and helped me completely change out all of the water and wash out the tank, and I had hoped that that would help him... but he still looks sickly... I don't think he'll last the night :( They are sending some new ones, but I feel so bad for this little guy... And Andy also texted me while I was feeling like I was going to cry because my day was so bad, and said he was going to hang out with his friends tonight. I'm not upset about that, it's good for him to hang out with them, but I was just so looking forward to seeing him since he always makes my day better... I guess things don't always go as you want them...

Maybe I'll get a chance to make a new card tonight, and that will at least make me feel better... I've got to start on my lesson plans though, so we'll see.

Anyway, on to the video. I hope you like this one. It's a short one, not a long tutorial.


Have a wonderful night all...

Link for action wobbles: http://actionwobble.com/

- Ashley

Sunday, November 27, 2011

Snowflake Card

Hey everyone!

It's almost time for bed... and back to work after a long weekend :( Oh well... I got back from Pennsylvania yesterday, and I went right into my craft room after talking to my parents for a couple minutes, and got back to crafting! I made my very first holiday card :) It's a snowflake card, so it's for any religion. I'm really excited with the way it turned out, and Andy even told me it was his favorite card that I've ever made :)

Anyway, on to the card...


I made 4 different designs and took pictures of them all. I'll post them tomorrow once I've gotten them uploaded onto my computer. I also made a video of the other Thanksgiving card I made. I know Thanksgiving is over, but I still wanted to show this card, and it had to be done with a video, so I'll post that tomorrow :)

Anyway, goodnight all!!!

- Ash

Thursday, November 24, 2011

Happy Thanksgiving!!

Hi everyone!!! I hope you're all having a wonderful Thanksgiving! I want to wish a very very happy birthday to my best friend since I was in 7th grade, Tara!!! I love you Tar ^_^ Who's going out for Black Friday tomorrow? I will be doing some shopping online perhaps, but you will not see me waiting in lines at the stores... I'm trying to get Andy to take me to Michales in the afternoon for the 50% off Jetmax modular storage. I might be moving in with him in a couple weeks, so I will actually get to finally set up a real craft space instead of having all my stuff packed into drawers in our back bedroom... Their storage units have pretty good reviews, and people say to get them when they're on sale or when you have a coupon, and since they are on sale... The only problem is we are in Pennsylvania for the weekend, and the closest Michales to his brother's house (where we are staying) is in Erie, 70 minutes away... instead of 3 miles down the road at my house, lol... bummer.


Anyway, we recently found out that our friends were pregnant!! I'm so excited for them, I made this that same week and sent it to them when we found out. I think it turned out so so cute, I love it!!


I think that I used the Vintage Creme by Papertry ink for the card base.
The layering mat is from the DCWV Baby Girl Nursery stack.
The clothesline is cut from the Baby Steps cartridge. They don't know what they are having yet, so I tried to stay more neutral on teh colors, hence the reason I picked green.
I used Stickles on most fo the image on the front.
The inside sentiment is two different stamps from the My Pink Stamper stamp set "Sweet Baby." It looks like I stamped it in Old Olive from Stampin' Up possibly? I can't remember remember, it was about a month ago when I made this...


Speaking of Stampin' Up, their new Occasion Mini just arrived at my house 2 days ago, and I'm in love!!! I want pretty much the whole catalogue :( I need to stop spending money, but they just have way to many cute products... Oh well, I'll figure it out...

I also bought some really cute clothes today from Deb and Body Central.


Both these skirts are from Body Central. I also bought the olive sweater to go with the ivory skirt and the same gray sweater to go with the black one. Andy already said they were hot and he's excited to see them on me, lol.

I also got this sweater in both black and white... for only $5.00!!!! at www.debshops.com

lightweight long sleeve open cardigan


I also found the Cricut Pink Journey Solutions cartridge itself on www.cricutmachine.com so I bought it!! I've been looking at trying to get this cartridge for a while now, but so far it's only been offered with the Pink Cricut or really expensive on ebay... but yay, I got it for $26!!!!

I miss my craft stuff... we're going to be in PA until Saturday, so no crafting for this long weekend for me... :( Oh well... Hopefully I can get some things done next week :)

Anyway, Happy Thanksgiving and Happy Black Friday to all!!

- Ash

Wednesday, November 23, 2011

Birthday Card

Hey everyone!!! It's the last day of work for the week!!! I'm so super excited! I am going down to Pennsylvania tonight with Andy to be with his family for Thanksgiving. I'm just glad to get away from work for a couple days. I've already got everything ready for next week just about. All my copies are made, I've got my lesson plan submitted, and my homework for next week is all put together. Yay!

Anyway, I couldn't get my video to finish uploading before I went to bed, so I tried again today, and as promised, here is my video! It's a birthday card I made for my friend Melanie. I hope you like it :)


I hope you all have a wonderul Thanksgiving!!!!

Tuesday, November 22, 2011

Oops

Well.... it's been almost a week since I posted. I have a video to post, but I haven't had time to upload it to my computer yet... I will try to do that tonight though. I also have another card to show, but I have been so so busy. With there only being 3 days of school this week, I'm trying to get everything ready for next week, so I'll be all prepared when I come back on Monday and I don't have to do anything over the break...

I think tomorrow I'm going to have my kids make Thanksgiving cards. I'm going to cut out the turkey from Create a Critter for them to create a card... I'm even thinking about bringing in my cuddlebug and letting them pick a folder to do a layer through... And I'll bring in my cardztv set of Thanksgiving stamps and let them pick a sentiment for their inside... I'll take pictures of their cards and post them for everyone to see. They'll be using gluesticks instead of my nice craft glue though....

Anyway, I will get that video posted later if possible, and then I'll get that other card to post too.

Sorry!!

- Ash

Wednesday, November 16, 2011

Thanksgiving Card

Hi everyone!!

My kids are at dance and music, so I thought this would be a good time to post. I filmed a video last night and it finally uploaded this morning, so I wanted to post it here.

This is a video of a really cute Thanksgiving card that I made last week! All the paper I used was Stampin' Up (the regals and neutrals collection), except for the Bazzil white. I also used Cardztv Stamps (www.cardztv.blogspot.com) and a set of Close to My Heart stamps. The only Cricut cartridge I used was the Art Philosophy cartridge.

Anyway, here's my video. I hope you enjoy it!! Sorry I'm so stuffed up :( I feel much better today ^_^


Here's a picture of the card


Have a great day everyone!!

- Ash

Monday, November 14, 2011

October Scrapbook Club

Hey everyone,

I'm feeling a little under the weather today... Couldn't yell at my students today because it hurt too much, so they took advantage of the fact that they couldn't hear me at times... but some of them realized how I was feeling and acted better today than normal, which was nice.

We looked at our first wedding venue today, Earhart Manor at Concordia University in Ann Arbor. It was nice, but I didn't realize it was outdoors, and I don't think I really want an outdoor wedding. We're looking at the end of September, so it would still probably be pretty nice weather, but we'll see.

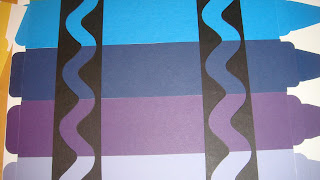
So I wanted to share the layout from my October Scrapbook Club. I already shared the layout from November (the crayon one), but I hadn't had a chance to post this one yet because I just finally took a picture of it the other day. I had a lot of fun making this one, but it took about 2 1/2 hours total. I think that was partly because I was having fun chatting with the other girls in the club too.


I decided to title my page Pumpkin Patch because Andy and I were going to go to a pumpkin patch that weekend, but it was so late in the season that by the time we went, there was hardly any pumpkins left... needless to say I didn't get a pumpkin... So I might have to change the title to something like "Fall Memories" or save it for next year and make sure I go to a pumpkin patch early in the season.

The background paper is More Mustard from Stampin' Up, and the layer for the pictures is whisper white.
We inked around absolutely everything we could with Stampin' Up's Chocolate Chip (I think) ink.
The pumpkins were made from some templates that Michele (my demonstrator) had, and the paper we used to make them is the new Spice Cake from the Stampin Up Holiday Mini. I loved it so much, that I just had to buy my own pack of it to use. Not sure what I'll use it for yet, but I just love it! Maybe I'll use it on my other set of Thanksgiving cards I'm going to make. Or maybe I can use it for some fall themed note cards, or just cards in general. I also bought the fabric to make that bag I talked about a couple posts ago. It would also be nice to use with other fall scrapbook layouts.

I haven't scrapbooked in a while, other than club, and I really think I want to start doing some more layouts. I have so many pictures printed out, and so many more that I have yet to print, that I'm getting so behind. All summer long I carted my scrapbook stuff back and forth from my house to Andy's house so that I could scrapbook my memories with Andy. I'm going to get back into that after Christmas is over.

Anyway, we used the Stampin Up Simply Score tool to create the rosettes. I think we used the scallop punch to cut out the scallops, and then we scored them all over the paper. Then we mountain/valley folded them and put two of them together to make the one rosette. I ordered the Ribbons and Rosettes cartridge for my cricut, and I can't wait until that comes in because it will probably be so much easier to make them!

The buttons are the Jumbo Spice Cake Designer Buttons, also from the Holiday Mini, which I also bought because I loved them as well! I just can't get enough of thier products, I want everything!

 
Well, I think that's long enough for tonight... I am going to try and figure out how to create another video (without using a tripod since I don't have one) and actually show you step by step how to make this really cute Thanksgiving card I made. If not... then I'll post a picture by the weekend. Hopefully I feel better so I actually sound like myself if I can figure out how to film it...


Have a great night everyone!

- Ash

Sunday, November 13, 2011

3 x 3 Mini Notecards


Hey everyone, I'm back again!!! I know it's just been a little but, but I wanted to go ahead and add my video for you to watch. I'm really excited with the way this set turned out. I think showing a video of the box captures the sparkle and shine of the cards better than a picture could. Anyway, I've made about 5 of these sets and boxes so far, and I've gotten my friend Melanie addicted to them too... Thank you Mary from www.cardztv.blogspot.com for the wonderful idea!!! 


Here's a picture of the whole thing. I just really love the silver glitter paper from DCWV, it's so pretty and shiny!


I hope you enjoy! Like I said, it's my first video, so yeah... Hopefully more to come in the future!

Night all!

- Ash

More of the Card Box

Hey everyone,

I finally was able to upload my pictures to my computer so I'll be able to post some of those. I've got a video to share, but it's not uploaded yet... Watch for that in a little bit.

Anyway, Andy and I went to Walmart to get his oil changed today, and I happened to walk by the ribbon aisle... I bought about 14 spools of ribbon in all different shades! I'm so excited to use them! I lined up all my ribbon in color order today and they all looked so pretty! We've also spent much of today watching the NASCAR race... Andy is in love with NASCAR, lol, so I guess I've got to like it too.

I wanted to share some more of the cards that I included in my friend Kelly's card box for her birthday.


I figured I should probably include a thank you card in her card set, so here it is. It's a 4 x 4 card. I used the DCWV Shimmer stack for the green layer, but I can't remember what the pink layer is.
I used core'dinations all in the family colors for the green and pink layer in the watermelon, but the white layer is from the Core'dinations pearl pack.
The watermelon is also cut from the Preserves cartridge (which is such a cute cartridge!)
The ribbon is from Papertry Ink.
I also use Stickles on the seeds in the watermelon.
The "Thanks a Melon" stamp is from MyPinkStamper Stamps Fruit and Veggie Puns set.
I had to make my own envelopes for these since I didn't have any laying around. I used the cricut, but can't remember which cartridge I used since it's been a month...


I guess I was on a pink and green kick when I made her cards... Anyway, this is the other monogramed card I made for her. I thought it would be nice for her to have two choices. This card is a standard 5 1/2 by 4 1/4 card. The card base is a Papertry Ink color (can't remember which one...)
I believe I also used the DCWV Shimmer stack for this card as well. I ran the white layer through the cuttlebug swiss dots folder to give it some texture.
I used a scallop edge punch on the boarder to give it a little more detail and then placed a vintage creme (Papertry Ink) layer behind the scallop edge.
I think the circle with the K was cut from the Storybook cartridge.
The ribbon is also Vintage Creme from Papertry Ink. I love thier colors, but thier paper is kind of thick for the cricut... I think they make nice card bases though.


This was the last card I made for her and I think it is by far my favorite card that I have made so far. I just think it's so cute!
The girl and cat are cut from Kate's ABCs (a beautiful cartridge!) at 4 I believe (it could be 3 3/4 though)
Most of the paper I used to make the little girl was from Core'dinations, though the brown background layer was cut from Stampin' Up (possibly Chocolate Chip?)
The card is a 4 1/4 by 5 1/2 card.
The glitter patterned paper layer is from the DCWV Nana's Kids stack and I think it is just the cutest paper!
I used the magenta, yellow, and icicle stickles for her hat to make it stand out and give it a little more shimmer.
The ribbon is from Papertry ink.
The inside sentiment is from a Close to My Heart set. It was a promotion where if you spent so much, you got a free stamp set. It came from the free stamp set and I thought it was just a nice anytime sentiment to put inside.

So yeah, I think this card turned out just so incredibly cute that I made a couple more for myself... I'm running out of the DCWV paper though so I might have to go get another stack just for that paper! Lol.

I'm still waiting for that video to finish loading, but it should be up later. It's just a short video where I finally show you one of the boxes of mini notecards that I've been working on. It's my first video so it's kind of bad... but I hope to make more in the future!!

Have a great night everyone!

- Ash

Saturday, November 12, 2011

Card box

Hey everyone! It's been a couple days since I posted, but I had to work on lesson plans Thursday and then I went to the movies last night. Andy, my friend Melanie and I saw the new Harold and Kumar movie last night. We saw the 3D version and it was awesome! The 3D graphics were so good!

Melanie and I had craft day yesterday. I didn't have school because of Veteran's Day. I drove out to Andy's work to have lunch, and then I went to Michaels. They have paper packs on sale for $11.40, so I ended up buying 6 packs I think? Wow... I have an obsession. I was really there to buy ornaments for the Christmas project I'm going to do with my students, but when I saw they were on sale, I just had to get some. I got a couple glitter packs from DCWV that are different from their newest one. I also got a shimmer stack in new colors, a patterned cardstock pack and then 2 of the 180 patterned paper packs. When I got home, Melanie came over and we had so much fun! I finished up one set of my Thanksgiving cards, which I'm so excited to show you! However, I have just discovered that my camera memory card adaptor does not fit in my new laptop, so I'm going to have to get a new one or something so I can upload all the pictures I've taken of my new crafts :( I also made a video and took a bunch of pictures of the 3x3 mini notecard boxes that I've made... I will try and upload some of those tomorrow. Melanie fell in love with the mini notecard boxes and decided to make a set of her own yesterday while I made the Thanksgiving cards. Her's turned out really cute for a first attempt! She loved them so much we went to Joanns yesterday and she bought a bunch of paper packs too! Hahaha! I bought two more packs from there because DCWV came out with some new packs that they just put out yesterday! It's called the Creamy stack, and it's so nice and smooth feelings. It's got a bunch of bright colors in it that I can't wait to use. I also bought the chalkboard stack, and I think it's paper that you can actually write on with chalk. I just liked the texture and colors so I bought it. She also bought the Martha Stewart Score board so she could make the boxes! Haha, I love to bounce ideas back and forth with her.

Anyway, my mom and I went back to Joann Fabrics today to get some interfacing to make a purse that my Stampin Up demonstrator showed me. I'm so excited to try sewing for the first time!! My mom is going to help me though... It's so super cute! I'll post a picture when I'm finished and add a link to the blog I got it from.

Ok, so on to the crafts... I made this box for my friend back in the beginning of October for her birthday. I included 4 different types of cards in it, with 5 of each. I'll post the box and then a couple of the cards. I'll post the rest later.


The flower is from an imagine cartridge, though I can't remember which one... I'm going to guess Lori's garden.
The letters are cut from the Hello Kitty Font cartridge, and I used the imagine to fill them in
The tag is cut from the close to my heart art philosophy cartridge
The paper is from the DCWV All Dressed Up stack and I love it!!


This is one of the cards I put into her box. I made two different sets of Monogram cards for her and this is one of them. The white layer is from the Core'dinations pearl pack and the blue top later is from the DCWV Shimmer stack. I can't remember which cartridge I used to cut the scalopped circle on the front... But I used Storybook for the K, so it might have come from there.
On the inside, I stamped an image using the versamark ink and then I heat embossed the image to give it some shine.  I thought it gave the card a little more so it wasn't so plain.

Ok, so that's it for now. But I will try to get those other pictures loaded on my computer and I'll post the other 3 cards from my box for my friend Kelly.

- Ash

Wednesday, November 9, 2011

Thinking of you

Afternoon everyone!

My niece is spending the day at my house so she's running all around being cute. She's just about 17 months old, so she's so precious at this age.

Anyway, a little over a week ago, Andy's grandma fell and hurt her hamstring. I decided I would try and make her feel a little better, so I made a card and sent it to her last week. I haven't heard back from her, but Andy's mom told him that she liked the card.


It's a regular sized 4 1/4 by 5 1/2 card, but with a gate fold.
I believe that both papers on the outside are from Papertry Ink as well as the ribbon.
The butterfly was cut from Florals Embellished at about 2 1/2 inches I think? It could have been cut bigger, but oh well.
The stamp sentiment is from a Close to My Heart Stamp set. The inside stamp is from "Childhood Portraits" (I think is the name), also from Close to My Heart.
The flower paper is from the Die Cuts With A View Glitter paper stack.
I ran the outside blue pieces through the cuttlebug and I used an edger punch on the inside blue paper so the background would show through.
I added some more embellishment by using stickles on the butterfly and flowers on the cover.

Overall I was pleased with this card. I think it turned out really cute and I really hope it brightened Andy's grandma's day.

I more day of work this week because of Veteran's Day, so school is closed on Friday. I am so so excited. We also had professional development yesterday so we didn't have any kids. It made for a really easy day. My kids are not my favorite group this year... But I'm trying and working with what I got (they came to me a month into school...) My friend Melanie is going to come over and we're going to work on Thanksgiving cards. I've finished several sets of 3 x 3 notecards, so I'll have to take pictures of those to post my finished result. I'm still waiting for my envelopes for the mini notecards, but those should be in by Friday I think.

Anyway, more pictures tomorrow! I need to get caught up with all my crafts so that everyone can see what I've made so far.

Have a great night!

- Ash

Sunday, November 6, 2011

Another Halloween Card

Hey everyone! It's been a couple days, but I've been pretty busy. I'm typing this up on my new computer though and I'm really satisfied with it!! Friday I stopped by my Stampin' Up demonstrator's house to pick up my club order. I ordered the water colors palette, and then some sponges so that I could do sponging around edges of cards.

Saturday was the Michigan State game, so we were gone pretty much all day. I also got to pick up my engagement ring from Helzberg. It's been there for a week being resized because it was too small :( I've missed it, but I'm so glad to have it back!! He asked October 10th by the way.


 When we did get home, I decided I wanted to start working on my Thanksgiving cards using my new Stampin' Up products!! I only made one design so far, but I really like it. I've alreay got my idea for the next card and I can't wait to try that one! I ordered some action wobbles to put on it, so I'll have to wait until those come in to do that design.  I'm going to use my cricut for that one, and for this one I used all stamping techniques. I wanted one of each... and I don't really have too many people to send cards to anyway, mainly just my fiance's family and his friends that live out of state. The card I made today has two stamps from the "Thankful For You" stamp set by cardztv. (www.cardztv.blogspot.com) It also included a stamp from Close to My Heart.

 This afternoon I went to another craft class at my Stampin' Up demonstrator's house. We made 2 Christmas cards and then we made a candy holder treat thing that I'm going to make to give to all my third graders. I'm going to start working on their Christmas presents soon I think because I don't want to be doing it last minute. (I did that last year, and was up really late the night before I wanted to take them into school...) Anyway, I'll take pictures of our crafts from today and post them later.

I still have a couple more Halloween cards I want to share with everyone, so I'm going to finish those up first.


This is a standard 4 1/4 by 5 1/2 card.
The base of the card is Orange Zest from Papertry Ink.
I ran the black mat through one of the Cuttlebug Mini Monsters compaion folders.
The boy was cut from Mini Monsters at I believe 4"
The ribbon is also orange zest from Papertry Ink.
The pumpkin paper border is the Halloween design series from Papertry Ink.
The button is also orange zest from Papertry Ink.
The saying is from MyPinkStamper stamps Spooky Puns (www.mypinkstamper.com)


My other Halloween card is sitting on my sister's memory card in her camera, so I can't post that one right now... Oh well

Thursday, November 3, 2011

Monster Card

Evening everyone! I'm just about to head to bed, but I wanted to post another card. My new laptop arrived today, but I haven't had the time to transfer all my files from my old laptop on to my new one, nor have I had time to play around with it :( Oh well. Tomorrow starts the weekend, so I'll have time then. Anyway, here's another one of the Halloween cards I made.


This card is a little different. I used a 4 1/4 x 5 1/2 base, but then I cut the monster from Mini Monsters in the card feature. So my card is actually the monster cut in card format. I used core'dinations paper for most of the card. The 4 x 5 1/4 green base was run through the cuttlebug. Then I added stickles to his horns and tail. The ribbon is from Papertry ink (raspberry fizz)

The stamp on the outside and on the inside are from My Pink Stamper Spooky Puns (www.mypinkstamper.com)

Anyway, I'm off to bed because I'm super tired. One more day in the week!!!

- Ashley

Wednesday, November 2, 2011

Scrapbook Club

Good evening all!! Thank you Mary for becoming my first follower!!! I wasn't able to finish my 3x3 note cards today :( I went to the bookstore to get a wedding planning book and wedding dress magazine and to the grocery store for my sister and dad. So, by the time I got home, I only had about half an hour to pack my stuff to stay at Andy's tonight and get ready for my scrapbook club. I did get most of the box made, I just need to put the ribbon on, and I'm still hoping to make a monogram for the cards... We'll see what happens.

Anyway, scrapbook club was really fun tonight! The layout is super super cute today :) Like I said yesterday, if you find that you absolutely love these layouts, my Stampin' Up demonstrator sells them as kits. She has all the pieces that you need cut, and she also includes printed out directions on how to assemble the pages. They are only $6 (not $8 as I mentioned yesterday). Here are some pictures of the layout we made today. It's perfect for those that have kids or are teachers. I'm not sure what I'll use mine for yet as I don't have any kids and I don't really scrapbook anything I do at school, but focus more on my fiance and family, but if I figure it out, I'll post pictures of the completed page.


All paper used is from Stampin' Up (since it is a Stampin' Up club). We used colors from the brights collection and the regals collection. I just love this super super cute layout, thanks Michele!!!

That's it for tonight. I'll post more of my Halloween cards tomorrow. This weekend look for a card box that I made for my friend's birthday at the beginning of October. I'll show you the box and the 4 card sets I made for her.

Have a wonderful night everyone!!

- Ash

Tuesday, November 1, 2011

Halloween Cards

Hey!

I started a new project today, 3x3 mini note cards. I finished the actual cards, but I think I'm going to print out a monogram A for them before I call them finished. Hopefully I'll have time to do that tomorrow, plus make the box to put them in (inspired by Mary at www.cardztv.blogspot.com). This is my second set, so I'll post a picture of both when I'm done! I think I'm going to make a set for each of my coworkers at school that I'm close with and give them to them for Christmas. They're really easy and don't take too long to make. I'm becoming obsessed with them, so I'm sure you'll see many more sets to come. I'm going to a scrapbook club with my Stampin-Up demonstrator tomorrow though, so not sure I'll be able to finish tomorrow :( Last week was our first meeting, and because of the specials, we had to meet again so soon. I'll post pictures of both layouts. Kits to make them are available for $8.

Anyway, I wanted to start posting a couple of my cards. Since Halloween is over, I'll start with these.

I made about 5 of these cards and sent them out to people. I kept one to save in my stash to look at later. 
Card base - Orange Zest by Papertrey Ink
Blue Mat - Core'dinations paper embossed with the seeing spots folder
Ribbon (which I later tied a knot onto - I ran out while making these) from Joann Fabric
Hello Kitty cut out from Hello Kitty Greetings at I think 4 1/2. 
Sentiment from My Pink Stamper Stamps Spooky Puns (www.mypinkstamper.com)
Stickles used for the glitter on the kitty.
Heat embossed with clear sparkly embossing powder


I only made one of these, though I wish I had made more. 
All paper used was Core'dinations (which I absolutely love!!!)
Witch bird cut from 3 Birds on Parade
Ribbon from papertry ink
I also used the Drippy Goo Punch by Martha Stewart
Stamp sentiment from My Pink Stamper Spooky Puns (www.mypinkstamper.com)
The background mat was sanded to show the under color. 

That's it for now, but I've got more and I'll post them tomorrow! Have a wonderful night :)

- Ash